

Cutting at an angle can be absurdly tricky, but there are a number of things you can do to help makes things a bit easier for yourself.
Mitres & Bevels
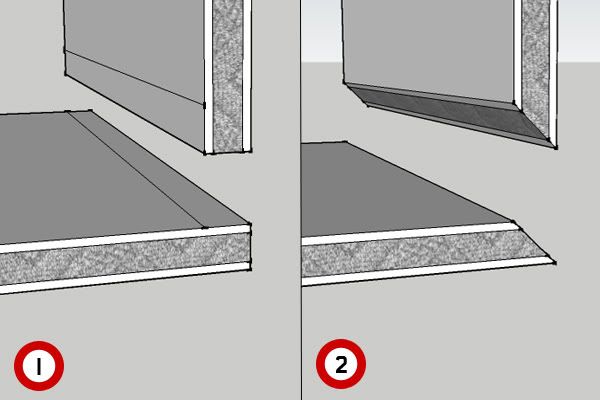
A 45* Bevelled angle is useful because one will allow you to make 45* junctions, whilst two will allow you to make very neat 90* junctions (A Mitre Junction)! In order to cut a 45* angle you should start by marking a line as far in from the edge as the thickness of your Foamboard. So, in my case (using 5mm Foamboard) I would measure and mark a line 5mm in from the edge.
You can then take your blade and carefully make a straight cut through the top layer of card. This really only needs a good scoring. The next cut will be made with your blade held at an angle... the tip of your blade sits on the edge of the lower piece of card, the blade itself intersects the scored top layer of card so that in profile the blade is tracing a 45* line across the Foamboard.
Making the cut is the difficult bit because it requires a slow, steady, but confident cut. Depending on your knifes design, you should be able to still use a ruler to help guide your cut and stop veering off course! If you can, do so as it makes things much easier!
You can use this technique to cut at pretty much any angle by adjusting where you mark the line in from the edge. A line further from the edge will give a shallower bevel, a line closer will give a steeper one. Use a bit of simple trigonometry if you want to work out exact angles.
The Trouble with Freehand Mitres
The problem with trying to cut mitres "freehand" is that they are not normally "clean"... you wouldn't want to have them visible if you could avoid it! Additionally, minor imperfections in the cut can result in less than accurate junctions. Most times, your bevelled cut will be concealed in a junction, and you can get away with filling in any gaps (such as with Liquid Green Stuff!). But if your cut will be exposed you may want it to look much smoother and neater. As a result, most people would prefer to use a special 45* Mitre Cutting Tool. There are a range of these available, including ones which cut a double Mitre, sometimes called "V" Cutting Tools. I'll cover this in more detail in the future.
Great article Oink (I just replied to your reply).
ReplyDeleteI'm playing with foamcore at the moment coincidentaly so this is very timely. I found that just glueing the sheets square could be covered up by making a plasticard cap for the joint (corners of buildings it looks fine) but your solution is far more elegant.
The methods shown above and in the previous joining article help to avoid the need to cover up untidy corners. However, depending on the final finish you can use things like stone corner capping to help conceal the build junctions and speed up general construction. I plan to go over how to cover exposed edges in a future foam board article.
ReplyDeleteMarvellous. Again.
ReplyDeleteThanks.
Very helpful guide for joining foam sheets. I have recently purchased some foamboards from online store Foamboardsource.com and found these instruction very beneficial.
ReplyDeleteNice blog. Thanks for sharing that look’s awesome.
ReplyDeleteDigital cutting services