

The Mitre
Although the Rabbet and Channel connections shown previously are much easier to make, the simple Mitre Junction is one of the neatest and, if you use an angled foam cutter then is very easy to put together! It also couldn't be easier to explain, all you have to do is take two foamboard pieces with 45* bevels and glue them at a 90* angle!
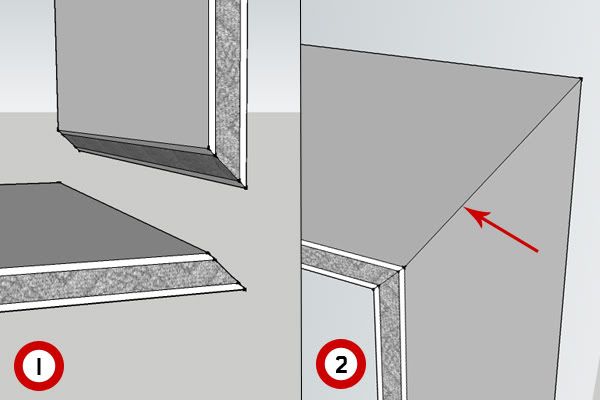
Use PVA glue as normal, but you can also add some hot glue along the inner corner (or the outside corner if this will be the one that won't be visible in the end. That's it! Simple to explain, difficult to get right! You can see in image 2 above that the junction is concealed at the edge, providing a much neater finish. If you are doing freehand bevelled cuts, then you have to make sure that the cuts are smooth and accurate.
I would generally recommend using an angled foamboard cutting tool to get a perfect cut. The result will be a junction with minimal visible edging... the junction gap between the two pieces will be mostly concealed on the corner, and means that you won't have to do as much (if any) tidying up to make it look nice!
The Invisible Junction
The great thing about creating mitres, and learning how to cut angles is that you can put all of this together and create an invisible junction! To create this, mark a line to represent where the outside of the corner will be. Then measure the thicknes of your material, to each side of this line. So, if using 5mm foamboard, you will end up with a line either side of this corner mark, 5mm away in both cases. The pictures below are actually slightly wrong, because you should end up with a small channel at the bottom, this helps give space to bend the card in the following step. It is a simple case of cutting with your blade at an angle to create a "V" shaped cut out.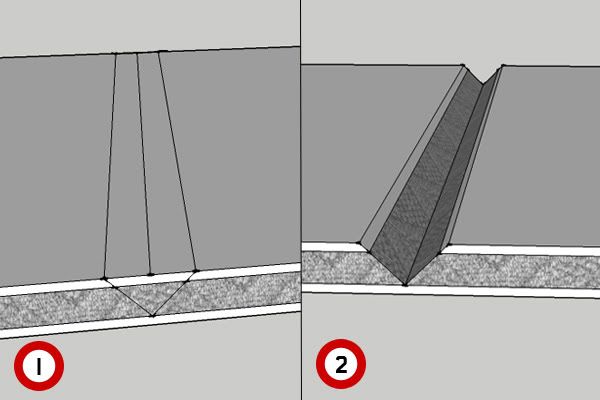 Again, there are special tools that you can use for this, and I'd recommend thinking about getting one if you are looking to do work using this technique. It takes all the hassle out as you can make both cuts at the same time with a single pass!
The one key thing is that you SHOULD NOT cut through the last piece of card (though if you do, then you can simply join the two pieces using glue). This card will be on the bottom when making your cuts, but will form the outside corner of the junction. Why? Because in the next step all you do is bend the single piece at the "V" so that they form a 90* angle. The resulting outside edge will show no visible sign of connection, as the card will be bent as opposed to cut and glued creating an Invisible Junction!!! Note that you can achieve this look for different angles too.
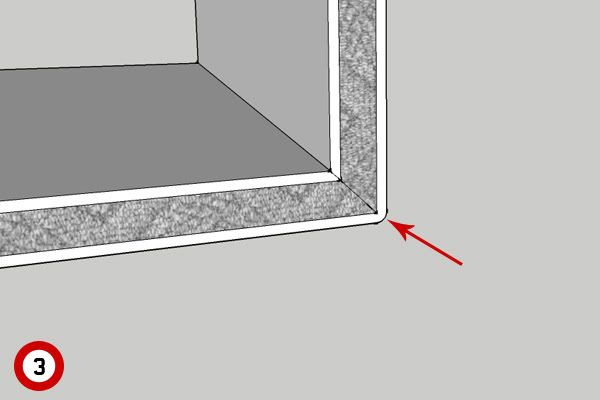
As a final tip for this type of junction, augment it with Hot Glue if necessary at the inner corner as the added strength will help counter the bent card wanting to straighten out.
No comments:
Post a Comment