


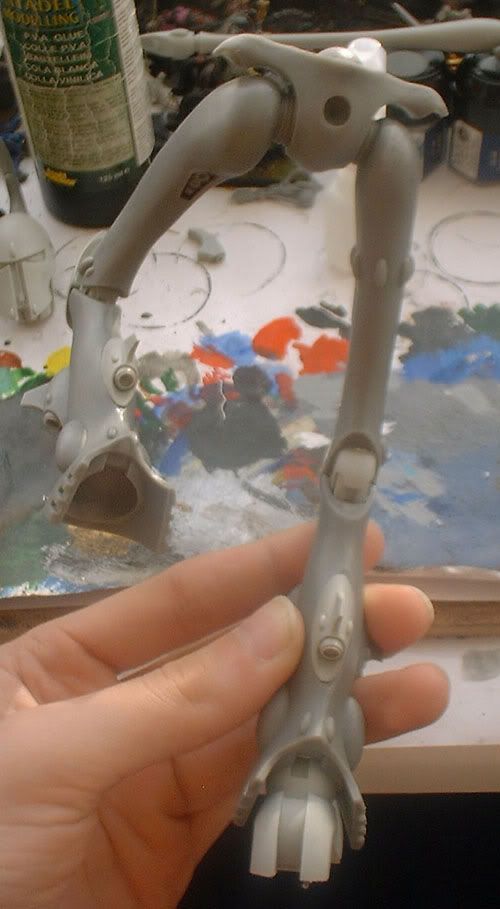
 After deliberating over the correct position, I drilled a guide hole in the right leg, figuring that even if the hole in the other was off then it was less critical as it was in motion anyway and I could get away with it! The large pin was then glued into the hole and was used as a guide for the left hip. With all the holes done, I had to make sure the actual hip section would sit at the proper angle between them. I would do this as I glued it all together. Putting super glue on the ball joints and the pin, and putting PVA glue in the hip joint, the elements were slotted together and left to dry.
 The foot at this stage was attached using white tac (like blu tac... but white) and was used to give me more of an idea of the angles and stuff!
This did cause hassle when it came to securing the right foot, and I'll cover the lengths and tricks I used to help me in the next installment.
To catch up with how the legs and feet were put together why not check out Part 1 and Part 2!
Verrrrry nice! Love how the pose is coming along, that's really going to look sharp. I'd imagine you're going with a pretty thick pin through the leg into the base? Something like this almost recommends the use of a length of wire coat hanger for a pin!
ReplyDeleteLooking forward to seeing more!