Space Marines! I found these guys in my loft the other day whilst looking for some Epic models that I was thinking of selling off. The funny thing is that these guys are clearly old and I have very little recollection of painting them! Early in my modelling "career" I would often dip into the Catachan box for head swaps and was not worried about cutting up marines to create unique poses!
Showing posts with label Painting. Show all posts
Saturday, 28 April 2012
Wednesday, 25 April 2012
Review - Halford's Grey Primer
Following building the unit of zombies I looked to a way of painting them, the solution is something for my UK readers (though can be bore in mind by others that priming options may be available in unlikely places). I had formulated a scheme where I could use a grey primer and build up grey tones from there. I read that Halford's do a grey coloured that should be suitable on plastic models.
Here is the review of that!
Thursday, 24 November 2011
Review - Army Painter Desert Yellow
Last time I ranted (or is that raved) about Plasti-Kote textured spray. I also read a really great post from Miniature Tim about sprays so I thought it would be good for me to say a few words about my experience with Army Painter Desert Yellow which I've been using to try and get quick and consistent results on my Imperial Guard tanks (what do you mean you haven't seen them!?).
The spray itself is actually very good, with great coverage. Although you can in theory use it on bare models, I use it over a black primer and this allows me to control the amount of colour that gets shown through. This is great for creating natural shadows.
Friday, 18 November 2011
Review - Stone Texture Spray
Something a little different today. I've been looking around for a suitable sprayable texture and came across THIS from Plasti-kote, available in the UK (and perhaps elsewhere too). I grabbed a can of the stuff from a local hobby store (Hobby Craft) though I'm pretty sure that DIY stores carry this too (Such as B&Q). I was eager to try it out and show you lot the results! There's not much to say about the product really, its a sprayable texture that comes in a variety of colours which in theory means that you can get a range of different looks onto your terrain very quickly and easily.
Friday, 11 November 2011
News! iPaint
Thats right, iPaint. Well, technically this month I've not done much painting at all, but that's because I'm working to bring a new commission service online! I'm calling this iPaintmodels... because iPaint models for people! You can head straight there at any time by using the iPaint tab at the top of this blog!
As this venture is for me to do in free time and not a professional painting service to provide me with a main form of income, I will only take on commissions for projects that I can feel passionate and enthusiastic about whilst avoiding any projects which are likely to suck the life out of me!
Thursday, 21 July 2011
Armies - Execute that turret!
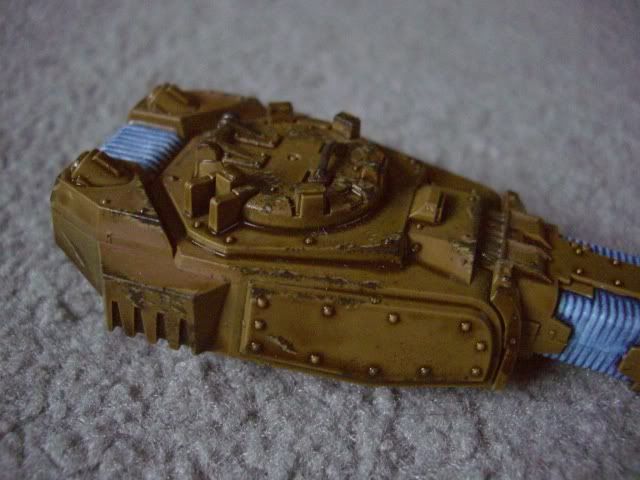
Its done! ...well, nearly. I think I might have to give the plasma a little more white highlighting, and the viewports aren't painted either - though I'm not sure what colour to do them (I'm thinking black at the minute - highlighted with Charadon Granite in order to keep the colour palette I've been using up to now).
The tanks hull is well on it's way too... But I'll save that for when I've finished the thing completely. I'm still waiting for the English summer to decide it wants to stop raining... I have spraying to do!
Thursday, 14 July 2011
Armies - Chimera chip details
Okay, so I have been working and practicing further with the Chimera. Having sponged Charadon Granite onto the model (concentrating on open corners and moving areas), and given the model an overall wash, I had to go back over and highlight the paint chip effect. This gives the impression of depth... as if the paint literally has chipped and flaked away leaving the base colour or metal showing a few milimetres behind it. Of course, highlighting every chip and scratch would be too laborious, so I concentrating in certain areas and made sure to highlight the lower edge (because light comes from above!) See what you think.
Tuesday, 12 July 2011
Armies - Breaching Progress!
I have been working on all my tanks (mostly all at the same time too) and I've got some images of the current state of the Hades Breaching Drill.
Since the last post here, it has had a wash using Army Painter Quickshade and some highlighting on the chipping as well as a series of heavy weathering washes. The idea, mostly because I am one to get distracted easily, is to use a combination of quick methods to help make the model look good! So, despite looking through the Forge World Masterclass book in great detail, I've skipped labourious techniques in favour of speedier alternatives.
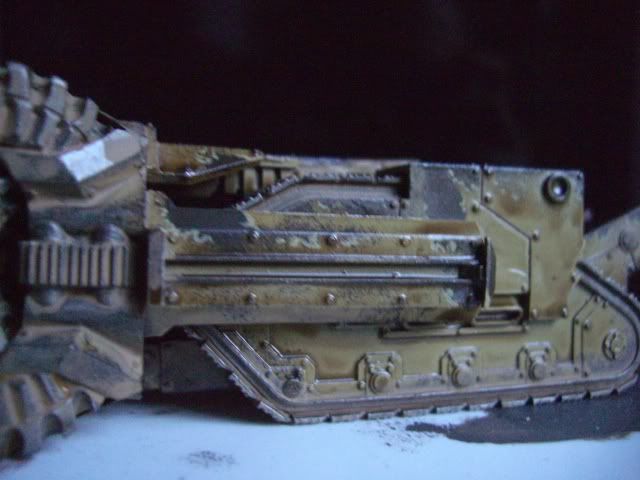
There is a little more weathering detail to do and neaten up... I don't hink I will be doing any transfers on this thing, and I of course need to finish up with a matt varnish to seal everything in and matt out the shading wash.
It's nearly done though...
Since the last post here, it has had a wash using Army Painter Quickshade and some highlighting on the chipping as well as a series of heavy weathering washes. The idea, mostly because I am one to get distracted easily, is to use a combination of quick methods to help make the model look good! So, despite looking through the Forge World Masterclass book in great detail, I've skipped labourious techniques in favour of speedier alternatives.
There is a little more weathering detail to do and neaten up... I don't hink I will be doing any transfers on this thing, and I of course need to finish up with a matt varnish to seal everything in and matt out the shading wash.
It's nearly done though...
Monday, 11 July 2011
Armies - Guard Tank Progress
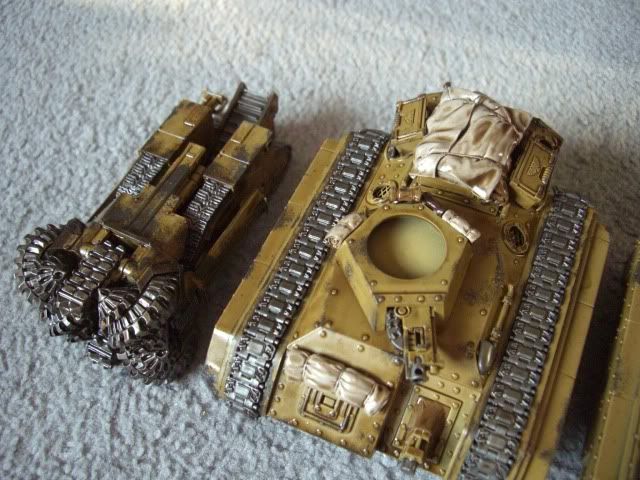
So, the two Hydras, one Chimera and the Hades have been given their shading wash. I think that it has worked with mixed success. Some areas look really good, and other areas could have used a little more care and control.
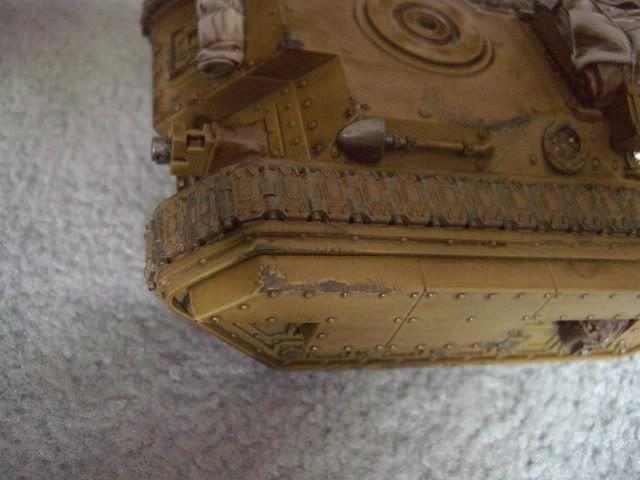
The quickshade wash does darken the overall look of the vehicles significantly, even though I was careful not to overload it. Oddly, it does seem to bring out the armour paint chip detailing a bit more as you can see in the first image - the well worn Hydra rear.
The shot of the top of the Chimera (above) shows the mixed effect when applied to flat armour. As you would expect, there is a degree of variation in colour. This is better than test done with the GW wash, as there is pretty much no tide marking. To be fair, the colour variation can actually be a nice touch to give a worn and well used look to otherwise flat plates.
The stowage bits have received a re-highlighting since this image, and I still need to give the armour it's own highlighting. I try going at it with a fine highlight of desert yellow, including highlighting up the paint chips to add more definition to them.
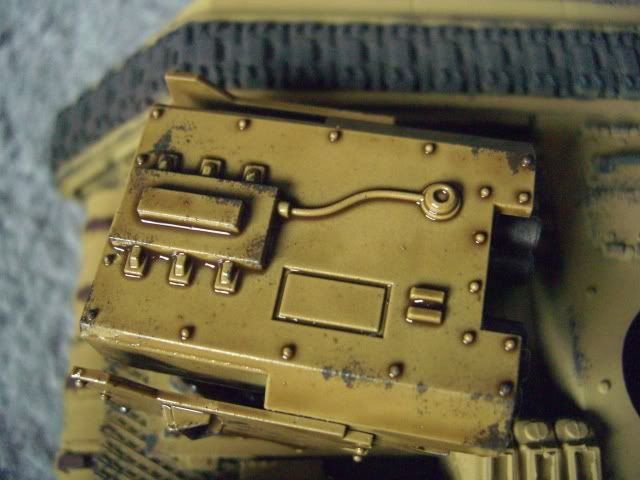
However, it is in the finer details that the wash really makes a difference. As you can see, it clings convincingly to the details, picking out rivets and joins between armour plates etc. You can really see the shine in this picture, but it's nothing that a coat of matt varnish won't get rid of.
Before that though, the gloss varnishing should actually make the next stage of weathering a bit easier. Again, I'm going to cut corners on that bit... this morning I tested out a weathering wash. I'll be able to see the results when I get home from work! (Fingers crossed!)
Oh, and of course, we have a comparison shot so you can see the difference in size between the Hades and a Chimera.
The quickshade wash does darken the overall look of the vehicles significantly, even though I was careful not to overload it. Oddly, it does seem to bring out the armour paint chip detailing a bit more as you can see in the first image - the well worn Hydra rear.
The shot of the top of the Chimera (above) shows the mixed effect when applied to flat armour. As you would expect, there is a degree of variation in colour. This is better than test done with the GW wash, as there is pretty much no tide marking. To be fair, the colour variation can actually be a nice touch to give a worn and well used look to otherwise flat plates.
The stowage bits have received a re-highlighting since this image, and I still need to give the armour it's own highlighting. I try going at it with a fine highlight of desert yellow, including highlighting up the paint chips to add more definition to them.
However, it is in the finer details that the wash really makes a difference. As you can see, it clings convincingly to the details, picking out rivets and joins between armour plates etc. You can really see the shine in this picture, but it's nothing that a coat of matt varnish won't get rid of.
Before that though, the gloss varnishing should actually make the next stage of weathering a bit easier. Again, I'm going to cut corners on that bit... this morning I tested out a weathering wash. I'll be able to see the results when I get home from work! (Fingers crossed!)
Oh, and of course, we have a comparison shot so you can see the difference in size between the Hades and a Chimera.
Saturday, 9 July 2011
Armies - Hydras get a wash!
Hello all, progress is being made on the army list, as found here and the painting plan is basically being made on the go! To be fair there is a rough idea, though as we all know, no plan survives contact with the enemy.
Last time I showed you initial progress on the Hades Breaching Drill, which included work on the metal parts using Boltgun Metal over Charadon Granite. This time I'm going to show you the progress on the Hydra conversions - but more exactly, the wash that I will be using on all of the vehicles! The Hydras have had a Desert Yellow spray base.
The "Quickshade", made by Army Painter and for all intents and purposes is a varnish. The shading effects this gives are really quite good, and have the added advantage of giving a varnished finish which is great for applying transfers following the wash.
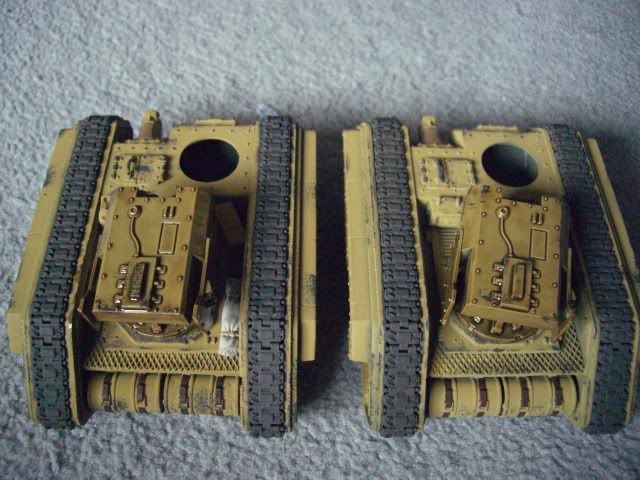
The pictures here show you that the wash does change the tint of the armour colour, adding a richness of tone as well as providing seemless shading. You do have to be particularly careful not to wash too much over areas, as otherwise it can pool but if you keep a keen eye on it as it starts to dry then you can get at bits to adjust things early.
I haven't started the wash on the main body of the Hydras yet, you might be able to make out that they still need some additional base colours applied first - such as a Boltgun drybrush onto the tracks, and I'm thinking a Catachan Green onto the Jerry Cans.
The downside with this wash is that it doesn't half take a long time to dry fully. It's going to be 12 hours before it is dry, and 24 hours before it is fully hardened. At which point I will be able to work on top of it.
Last time I showed you initial progress on the Hades Breaching Drill, which included work on the metal parts using Boltgun Metal over Charadon Granite. This time I'm going to show you the progress on the Hydra conversions - but more exactly, the wash that I will be using on all of the vehicles! The Hydras have had a Desert Yellow spray base.
The "Quickshade", made by Army Painter and for all intents and purposes is a varnish. The shading effects this gives are really quite good, and have the added advantage of giving a varnished finish which is great for applying transfers following the wash.
The pictures here show you that the wash does change the tint of the armour colour, adding a richness of tone as well as providing seemless shading. You do have to be particularly careful not to wash too much over areas, as otherwise it can pool but if you keep a keen eye on it as it starts to dry then you can get at bits to adjust things early.
I haven't started the wash on the main body of the Hydras yet, you might be able to make out that they still need some additional base colours applied first - such as a Boltgun drybrush onto the tracks, and I'm thinking a Catachan Green onto the Jerry Cans.
The downside with this wash is that it doesn't half take a long time to dry fully. It's going to be 12 hours before it is dry, and 24 hours before it is fully hardened. At which point I will be able to work on top of it.
Friday, 8 July 2011
Armies - Hades Breaching Drill
You may have seen my recent post with my 1750pt Imperial Guard Army list. In it there is a Hades Breaching Drill, which is a model that I have loved the look of since it was released. As the tournament I am going to allows Forge World items I thought this was the perfect excuse to buy one! That, and I somehow managed to convince my wife that this would make a great Fathers Day present!
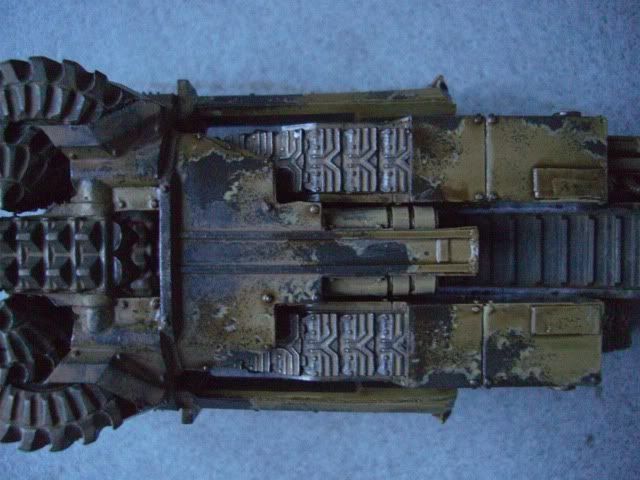
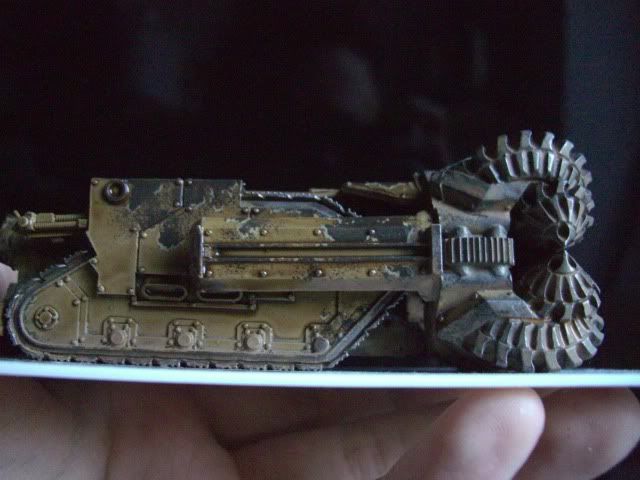
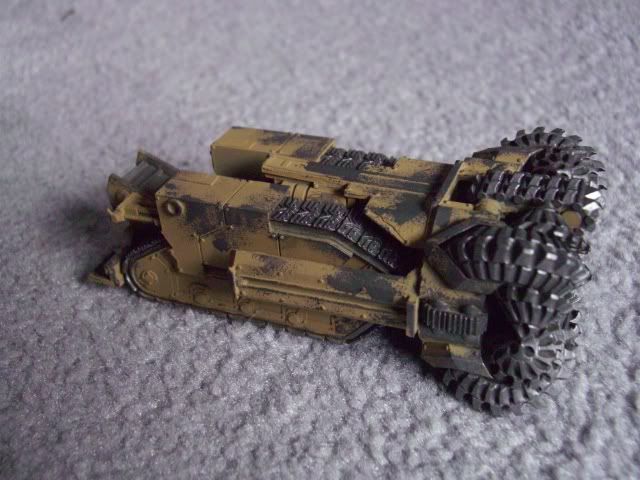
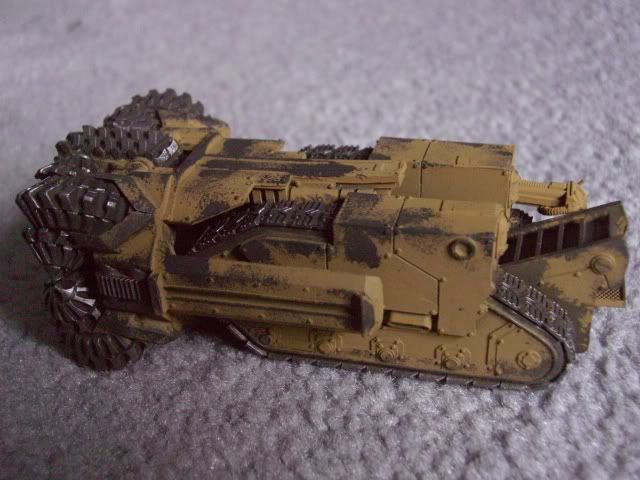
I was straight on the phone to Forge World and within a few days the drill arrived! Within even less time the parts were all cleaned up and put together (I have to say that this was a very simple model to build that came in fewer parts than I was imagining). I primed and base sprayed the kit as can be seen in these images, using Army Painter Desert Yellow spray (bought online from Triple Helix Wargames) and followed this with some heavy chipping / weathering of Charadon Granite applied with a sponge. I figure the model needed quite heavy paint damage to represent the trouble it goes through during drilling!
Not only is this a cool looking model that will work well in games of 40K, but it can also make a nice detail for gaming board terrain. This is perfectly showcased here on the "recalcitrantdaze" blog! Rictus has also converted some amazing looking mining machinery, equipment & terrain so be sure to take a look through related posts!
Rules for this little beast can be found in Imperial Armour Apocalypse II (and also in the free to download Siege Regiment Army List). Because you use a large template to represent it's arrival I have decided to fashion a 12cm (5") crater exactly for this purpose. Lucky for me I saw that I can buy this in a set from Amera Mouldings for a VERY reasonable price (Amera is also located within the Resources tab on the left). It has been ordered (along with another little something!) and you can expect item reviews in the near future.
Aside from this, painting is going to continue on the Hades and you will be updated as it goes!
I was straight on the phone to Forge World and within a few days the drill arrived! Within even less time the parts were all cleaned up and put together (I have to say that this was a very simple model to build that came in fewer parts than I was imagining). I primed and base sprayed the kit as can be seen in these images, using Army Painter Desert Yellow spray (bought online from Triple Helix Wargames) and followed this with some heavy chipping / weathering of Charadon Granite applied with a sponge. I figure the model needed quite heavy paint damage to represent the trouble it goes through during drilling!
Not only is this a cool looking model that will work well in games of 40K, but it can also make a nice detail for gaming board terrain. This is perfectly showcased here on the "recalcitrantdaze" blog! Rictus has also converted some amazing looking mining machinery, equipment & terrain so be sure to take a look through related posts!
Rules for this little beast can be found in Imperial Armour Apocalypse II (and also in the free to download Siege Regiment Army List). Because you use a large template to represent it's arrival I have decided to fashion a 12cm (5") crater exactly for this purpose. Lucky for me I saw that I can buy this in a set from Amera Mouldings for a VERY reasonable price (Amera is also located within the Resources tab on the left). It has been ordered (along with another little something!) and you can expect item reviews in the near future.
Aside from this, painting is going to continue on the Hades and you will be updated as it goes!
Subscribe to:
Posts (Atom)