

Showing posts with label terrain. Show all posts
Showing posts with label terrain. Show all posts
Monday, 21 May 2012
Blood Bowl Pitch

Wednesday, 22 February 2012
Working with Foamboard - Cutting Mitres

Cutting at an angle can be absurdly tricky, but there are a number of things you can do to help makes things a bit easier for yourself.
Tuesday, 3 January 2012
Air Traffic Control Tower - Mk II

Thursday, 29 December 2011
Working with Foamboard - Joining Basics Part 1

If you're familiar with woodwork joinery techniques then you'll probably spot some similarities here!
Tuesday, 20 December 2011
Working with Foamboard - The Basics
Unfortunately, whilst it is an easy material to use, it is difficult to master and there are a number of quick and simple tips and techniques to help overcome (or avoid) potential issues! Hopefully I can cover some basics here that you will find helpful, as I'm sure taking time to write this out will help me get re-acquianted!
Saturday, 17 December 2011
Air Traffic Control Tower

Tuesday, 29 November 2011
Battle Report! - "The Dawn of War"

So, here it is... any questions, just ask! I believe Valar will be making a video report will will answer lots of holes, I'll let you know when it's available!
Sunday, 9 October 2011
Review - Amera Plastics Landing Pad & Craters

I decided to order some craters and a landing pad. Arriving well packaged and relatively speedily, both required a small amount of trimming. But nothing that a good pair of scissors couldn't sort out. If only I had a good pair of scissors!
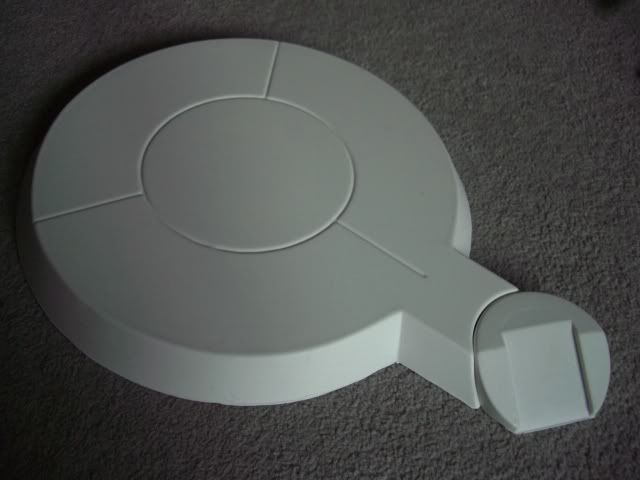
However, their products are all very cost effective!
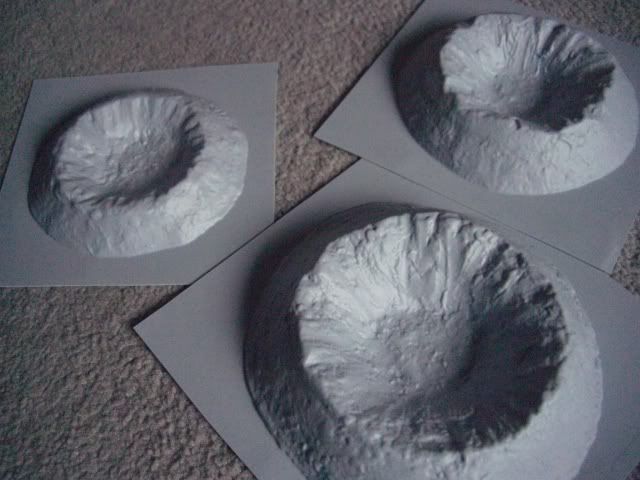
Considering the ease with which the craters can be cut and shaped, I have some ideas for how to use them, watch this space. I also have some very quick plans for painting the Landing Pad which involves the review of another product that some of you terrain builders might be interested in (assuming it comes out well!) So keep your eyes peeled.
Simples! If it's all this easy then I'll be sure to order from Amera Mouldings again! You can find them in my list of resources on the left hand side and by following the link at the start of this post.
Tuesday, 28 June 2011
Inspiration - Bristol Vanguard Gaming Club
Don't panic! I'm not dead! I have been utterly busy with another project to build and paint a 1750pt Imperial Guard army... I still have a lot to do with it but thus far I have avoided posting about it here because I would probably rather keep this project theme intact.
In the mean time however, I haven't been sitting idly and have been keeping a keen eye out for all sorts of inspiration. Not every gaming club has the good fortune to have a collection of awesome looking terrain. But at the Bristol Vanguard Gaming Club they have just that. In fact, not only do they have some awesome looking terrain pieces, but they have combined them into very inspirational gaming boards! Looking at the images below, and on their site I am sure that you can agree they have created some very nice themed terrain and boards, though that in itself is probably the subject of another post!
 I am reliably informed by an avid member of the club that they are lucky enough to have a pair of budding terrain experts that tirelessly scratch build and paint all of their terrain pieces. Using all manner of DIY sources and structures, augmented by a range of Games Workshop bits and pieces at least in part donated by other
  club members they go about their dungeon workshop to produce some of the best looking tables I have seen. Perhaps it's not just the fact that they can produce shuch nice looking terrain pieces, but that they can do this continually, and create very nice themed environments.
 Whats more is that they are proud to present them on their website, and can be found here. This site will of course be making its way onto my "Inspiration" page where it belongs. And I hope to at least try to recreate some of the great features that you can see, such as the barrack style buildings!
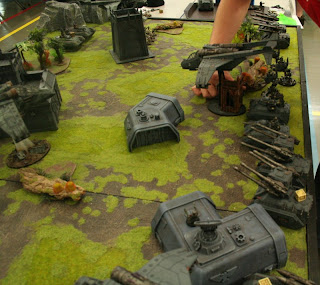 You can also check out more detailed and awesome slideshow of their boards in action at their 2011 "Longest Day" Tournament! Definately worth a look, and I will be making a note of it for next year for sure!
Of course, the scratch building portion of my terrain building won't really kick in until after I have exhausted the majority of the kit work that I have... unless I just can't wait any longer!
In the mean time however, I haven't been sitting idly and have been keeping a keen eye out for all sorts of inspiration. Not every gaming club has the good fortune to have a collection of awesome looking terrain. But at the Bristol Vanguard Gaming Club they have just that. In fact, not only do they have some awesome looking terrain pieces, but they have combined them into very inspirational gaming boards! Looking at the images below, and on their site I am sure that you can agree they have created some very nice themed terrain and boards, though that in itself is probably the subject of another post!


Of course, the scratch building portion of my terrain building won't really kick in until after I have exhausted the majority of the kit work that I have... unless I just can't wait any longer!
Wednesday, 15 June 2011
Re-Education Centre Cont...

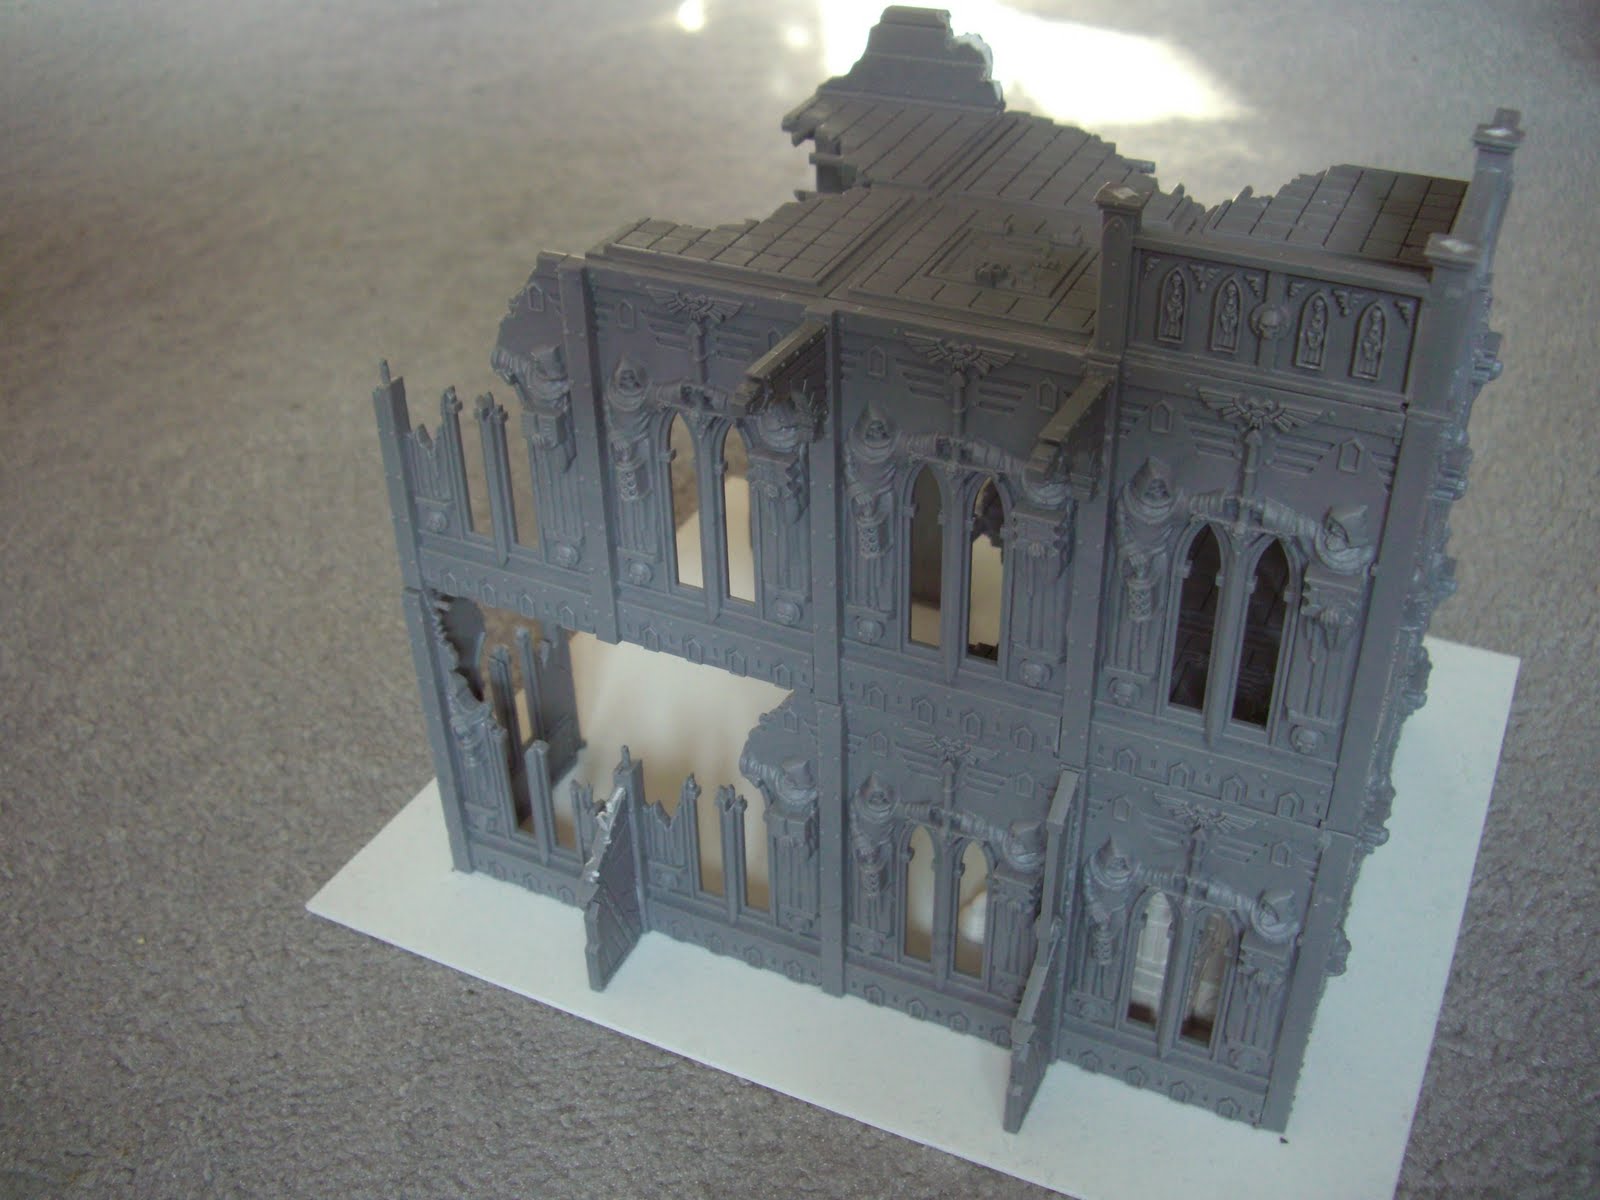
When adding extra parts (an entire storey in this case) it's important to keep the continuity of the story of the building. What this means is to ensure that damage flows through as you might expect. Looking at the first image below you can see the the bottom of the first floor (that's the top one because I'm not American!) has no damage, even though it sits above the quite damaged ground floor (that's the bottom one for any Americans reading!). This just wouldn't do, so I attacked the new part of the building with a pair of clippers. I think that it is this sort of minor attention to detail that is easily missed, but can make a big difference to the "believe-ability" of the buildings.

Thursday, 9 June 2011
Mechanicum Supply Stores


The second one came along because I saw an opportunity to use some of the parts from the Tamiya kits I was buying to adorn my Imperial Guard tanks. I was accumulating a high number of barrels, so I will be placing some of them and some Jerry Cans into it to add interest and colour. I attacked the doors with a blade and they are being kept aside to be glued in an open position. This, along with the windows have been placed with a view to maintaining the idea of preventing lines of sight being drawn through the building.
Progress on these chaps should move along quite quickly and easily!
Monday, 6 June 2011
Re-Education Centre

I decided again that one half of the building would be mostly intact, whilst the other half would have suffered the damage, so set about the wall and floor sections with that in mind. I hadn't really thought much about what was happening on any further floors yet, so I decided to just put some balcony sections for now and work out the rest another time.


You'll notice that the base for this building is a lot wider and this will allow me to build up rubble around the foot of the walls.
Friday, 3 June 2011
Governors Palace
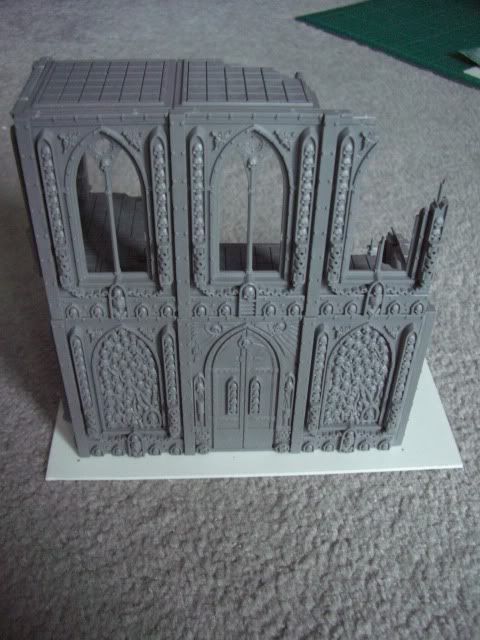
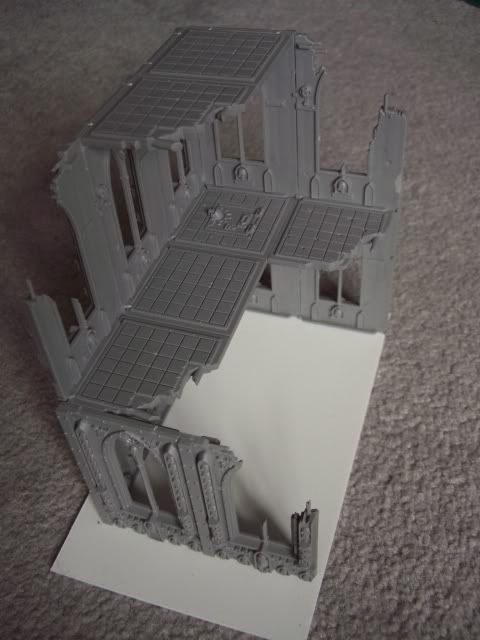
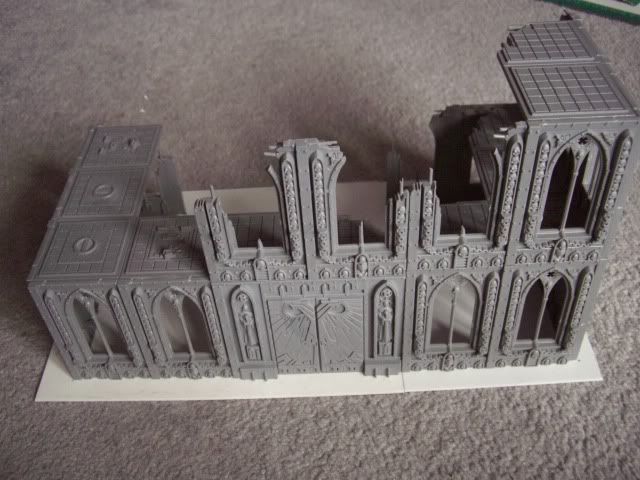
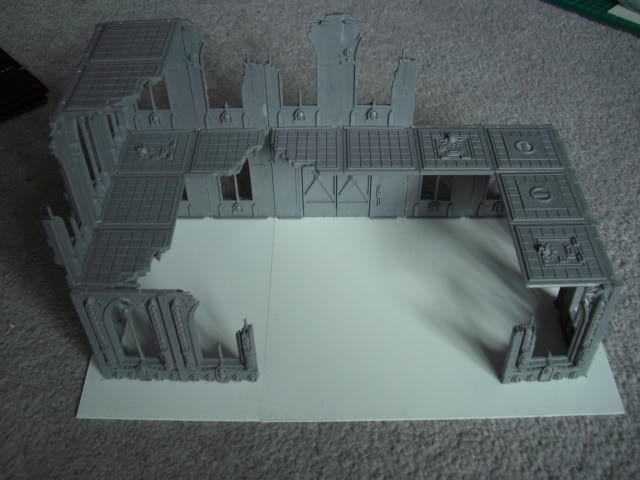
From a practical point of view the large open ground floor area should let lots of models fight over the building. Whilst the fact that the building is not complete at the rear could suggest severe damage, or further parts to the combined palace. Of course, it also helps to make the buildings more usable when they are used in two parts.
You will see that I am using plasticard for the bases of my buildings. This gives them something solid to stick on to but does not give me a tall lip as you often get with MDF basses... this should help the buildings blend into the board a lot better.
Thursday, 2 June 2011
Imperial Shrine
Well, I suppose this is as good a time as any to get you guys hooked by showing you initial work on the first building:
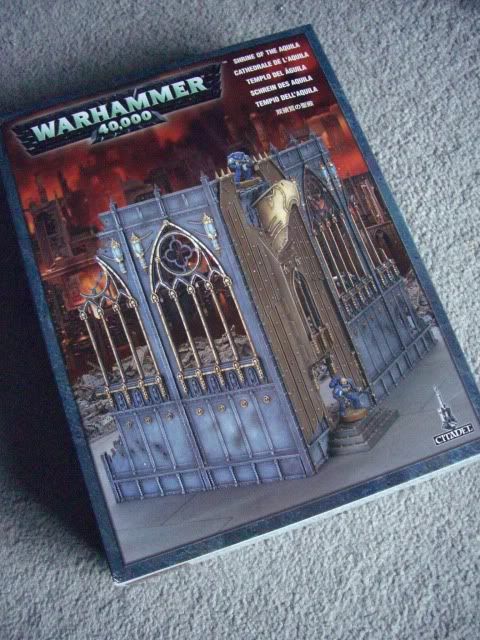
 Despite the big box of buildings sitting waiting for me, I went out and bought a pair of "Shrine of the Aquila" sets. These look really good, and a pair of them would be able to go together to make a VERY impressive church like building. It should be noted that because the walls are such large sections I found that a few were slightly bent, but nothing that a little bit of careful handy work couldn't fix! Overall, the Shrine box set are actually pretty reasonably priced and look like they have a fair amount of flexibility in their construction. Definately a worth while addition.
 With this in mind, I wanted to step away from the square look, in fact, I wanted to create a largely intact Shrine to fight over so after a bit of thinking I came up with a simple floor plan design to make the most of all of the parts. I measured up and cut out two template shapes to help construct the building more interestingly. One for the floor, and one for the roof.
 Here you can see the bulk of the Shrine. The large central space will hopefully house some sort of important looking artifact, relic or statue. I'm not sure what at the moment, maybe someone has some good ideas!?!
In any case, the keen eyed among you will notice that this doesn't even use a whole boxed set! You can see that even like this it would be possible to create interesting, half destroyed, shrines even if you were using only one boxed set. So, in any case you're probably wondering what happened to the rest of it!
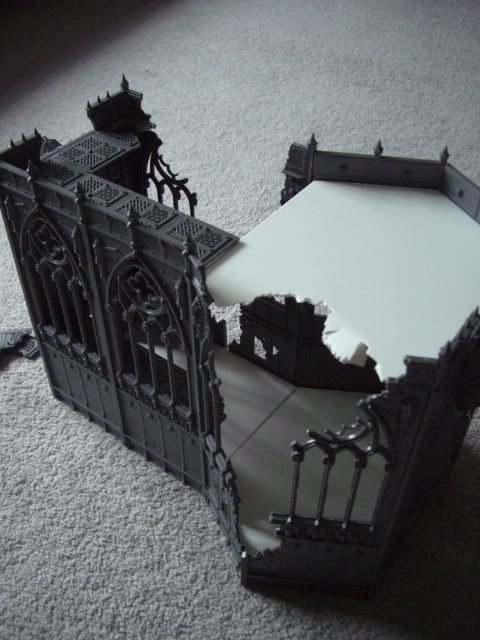
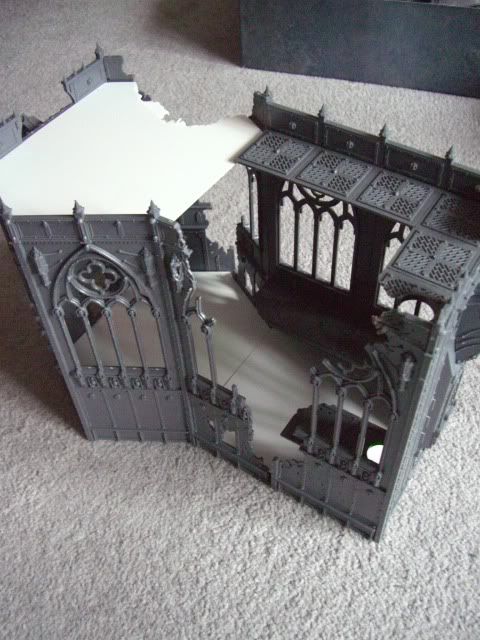
Well here it is... This will form the front portion of the Imperial Shrine, equivalent to the main area of most modern day churches (the Nave). The front part of the Shrine will give the overall feel of a traditional church like structure - with a long approach to the main area. It also lets me put in a middle floor which will help mix things up a bit when it comes to gaming.

When the two halves are placed next to one another you get the echo of a modern day church, but importantly without the Christian style cross plan layout - as this is something which would have no reason in the 40k Universe! However, the roof was clearly in too good a shape, so I went at it with a pair of clippers, snipping and twisting to get a random effect. All of the snippings were saved for later use, even small parts went into a pile which can later be ransacked for rubble. The two collapsed sections will help you get your arm in to move models about. The two sections aren't glued toegether yet, I think I won't do that until I've painted them. There's a fair bit of work to do until then though!


Of course, there is still a lot to do on this piece of terrain, and they include:
+ Add more detailing to the roof sections - as these will form a big part of the gamers view.
+ Include something to worship! Maybe the big Space Marine statue from the GW set... maybe someone can give some other ideas!? as well as some additional internal details (someone has already mentioned adding pews scattered in the nave!)
+ I also need to add some of the external details, such as the steps, and probably some buttresses etc.
+ Then of course I will need to worry about adding rubble and painting, but these will all be done at a later stage anyway.
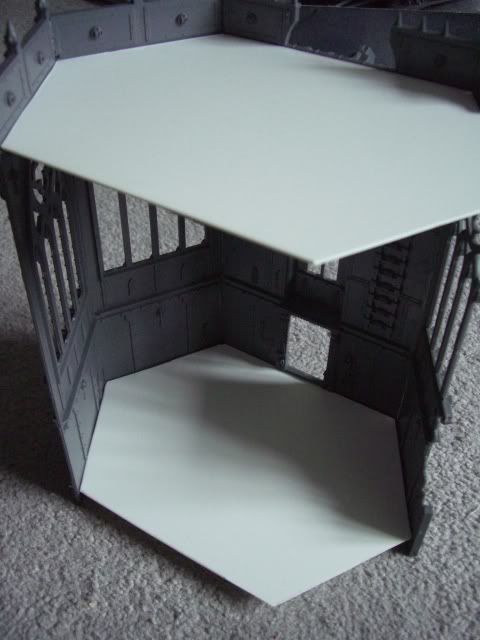
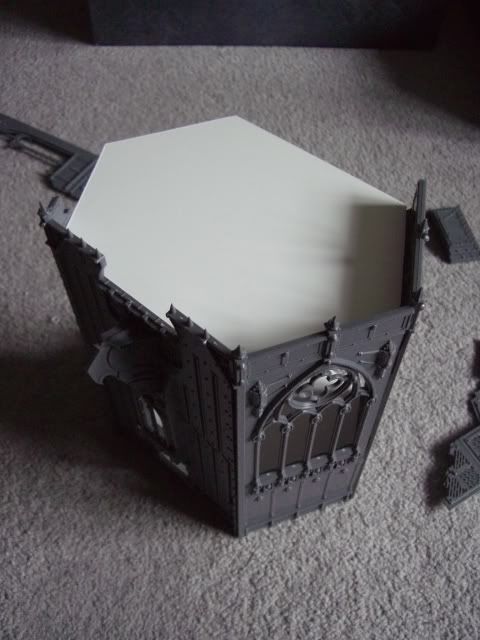
In any case, the keen eyed among you will notice that this doesn't even use a whole boxed set! You can see that even like this it would be possible to create interesting, half destroyed, shrines even if you were using only one boxed set. So, in any case you're probably wondering what happened to the rest of it!
Well here it is... This will form the front portion of the Imperial Shrine, equivalent to the main area of most modern day churches (the Nave). The front part of the Shrine will give the overall feel of a traditional church like structure - with a long approach to the main area. It also lets me put in a middle floor which will help mix things up a bit when it comes to gaming.
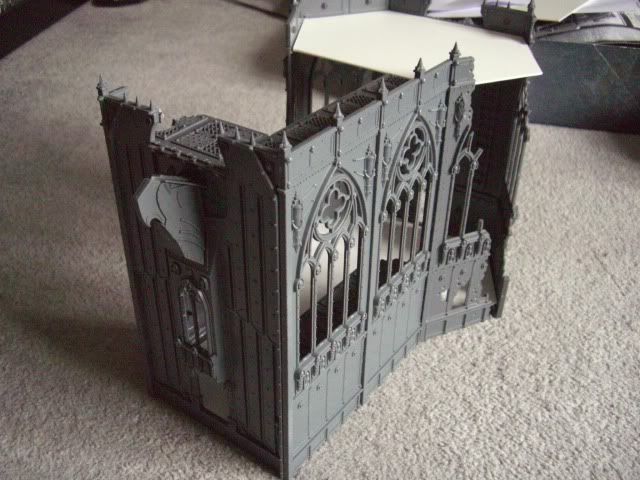
When the two halves are placed next to one another you get the echo of a modern day church, but importantly without the Christian style cross plan layout - as this is something which would have no reason in the 40k Universe! However, the roof was clearly in too good a shape, so I went at it with a pair of clippers, snipping and twisting to get a random effect. All of the snippings were saved for later use, even small parts went into a pile which can later be ransacked for rubble. The two collapsed sections will help you get your arm in to move models about. The two sections aren't glued toegether yet, I think I won't do that until I've painted them. There's a fair bit of work to do until then though!
Of course, there is still a lot to do on this piece of terrain, and they include:
+ Add more detailing to the roof sections - as these will form a big part of the gamers view.
+ Include something to worship! Maybe the big Space Marine statue from the GW set... maybe someone can give some other ideas!? as well as some additional internal details (someone has already mentioned adding pews scattered in the nave!)
+ I also need to add some of the external details, such as the steps, and probably some buttresses etc.
+ Then of course I will need to worry about adding rubble and painting, but these will all be done at a later stage anyway.
Subscribe to:
Posts (Atom)
