Last time around I put a little disclaimer to warn you that this post might not be pretty. It definately doesn't start off that way. With the gusto that would be the envy of many a freestyle disco dancer I managed to knock the Titan fresh off its feet and watched in horror as the towering beast toppled over. Heart in mouth, and head in hands, I done what any good modeller in my position would've... put down my beer and began to assess the damage.
Yep, that worrysome knee joint went! It had always had a degree of wobble to it. Funny enough, the ankle joint was in perfect condition, no doubt a result of the multiple interlocking pins! There was a small knick in one of the hip shields and one of the pulsars snapped. Luckily it was a clean break.
After receiving due medical attention, I decided that a degree of improvements was in order. With an eye towards increasing the portability of the model as well as its stability I removed the pin from the right knee joint and replaced it with a longer one... which now runs right the way through the knee and into the lower leg!
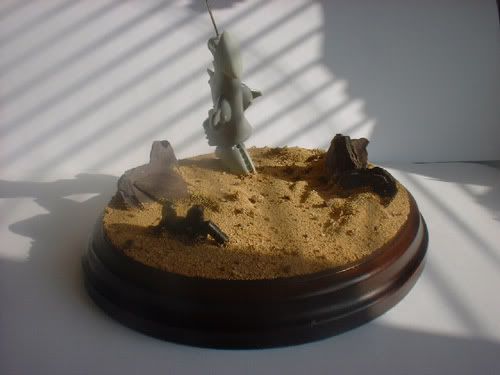
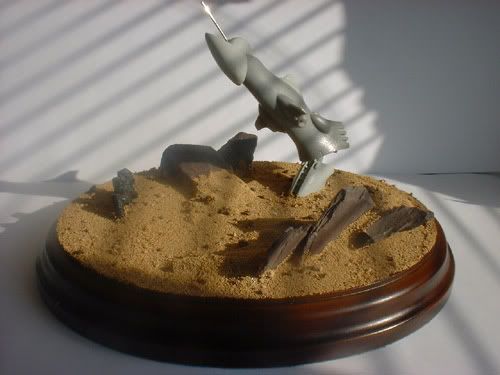
I decided again that not glueing this new pin in place would mean that I could take the Titan off of its base which would help storage and transport no end! Getting the base away from the model also meant that I was able to make a start with adding some modelling interest to it. I wanted to keep things simple - the Titan is the main focus, not the base!
These final tweaks meant that the Titan was now built and ready to get a lick of paint!!! I'll be posting one final time giving you lots of final built pictures (taken just before the base was modelled). Later this year I will probably post painting pictures but I'm eager to work on other projects before then!!!


I had feared something like that would happen. Its been my big dread when I was building my Warhound, and when I started painting it - they are solid chunks of resin, but still fragile - particulalry at a contact point. Its why I used a two part epoxy resin glue rather than super glue, plus giant pins - problem now is its a bugger to move around - I prefer the partially dismantled solution you have struck on.
ReplyDeleteYou base looks fantastic. Are you going to prime it - will you cover up the wood first? It looks great stained like that.
The horror! Oh, that sucks man - glad that you're able to turn it to your advantage though. Being able to break it down for storage and transport is a great idea.
ReplyDelete@Rogue Pom; I've since completed the base and yes, I did cover up the stained wood! I agree that the wood really does look nice it would have been a shame to lose it!
ReplyDelete@Mordian; It also means I can pack it in the same box as my Phantom Titan (albeit armourcast one!) but that's a whole other set of posts!!
I've got final built photos ready to upload in a few days. Stay peeled.
Mate, i feel your pain! My fully built and painted Reaver toppled off the shelf year before last!! Not a nice feeling!
ReplyDeletehttp://aguardsmansguidetoglory.blogspot.com/2010/10/ohmygod-ohmygod-ohmygod.html
Ouch GunGrave... thats really not cool! So the thing literally just fell apart? I don't believe it... If it wasn't the cat, it was definately the other half... they're hiding it... true story.
ReplyDelete